 by
by The latest update to DAKboard brings the ability to create tags with customized names! For customers with the Pro plan or better, keeping track of a large number of screens is now much easier. Once you categorize the screens with tags, the “Filter” feature may be used to pare down the list to show only those associated with a specific set of tag labels. Below is an example of how they work.
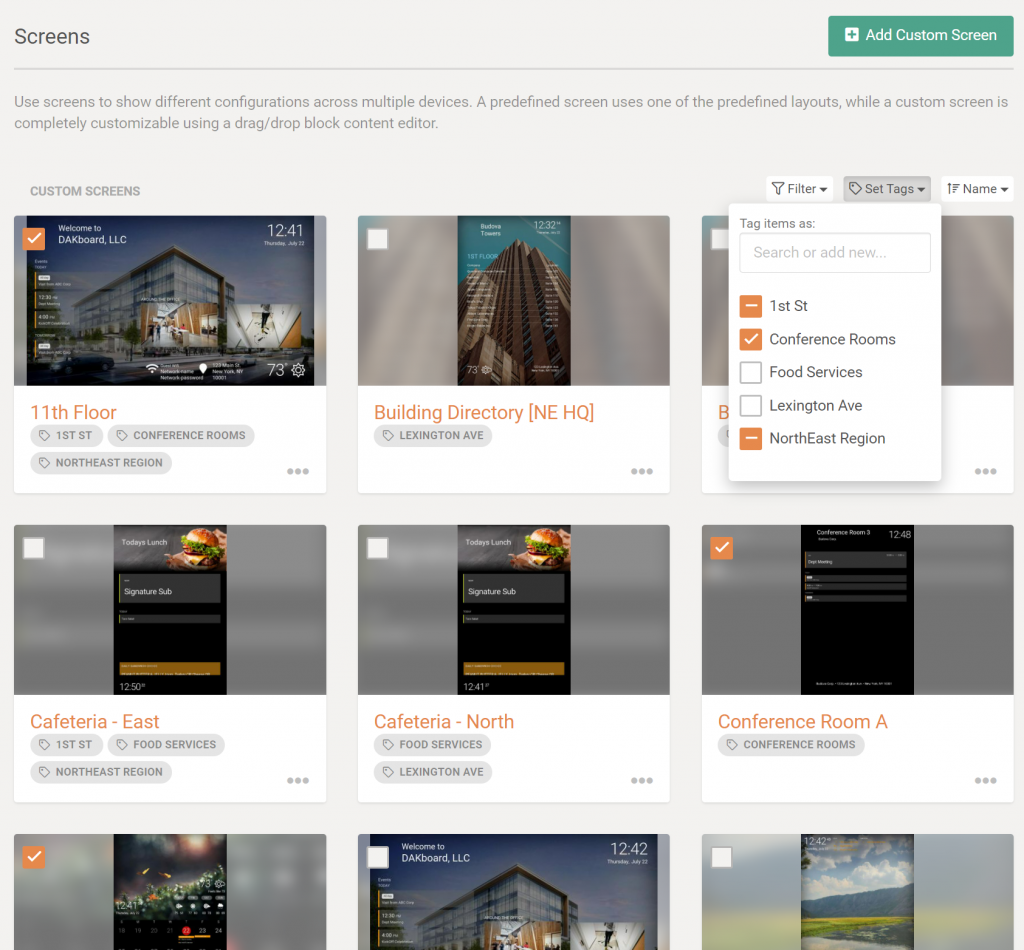
In the Screens listing, tags may be applied to checked items by selecting “Set Tags” near the top of the list. On its first use, type a new name and choose “Create New” to apply the tag to the selected screens. Continue adding as many as you need; afterward, simply use the “Set Tags” search field and checklist to manage tags on the screens.
When selecting multiple screens, a “minus” sign will appear in the Set Tags checklist for names that are associated with only some of the selected screens. Leaving the “minus” sign will keep that tag state unchanged for the selected items. However, changing these entries to be checked or unchecked will then modify all selected items, once applied. Otherwise, seeing a checkmark in the Set Tags checklist will indicate whether all selected items currently have the tag, or not.
The custom tags that are associated with screens will be displayed on each card for quick identification at a glance.
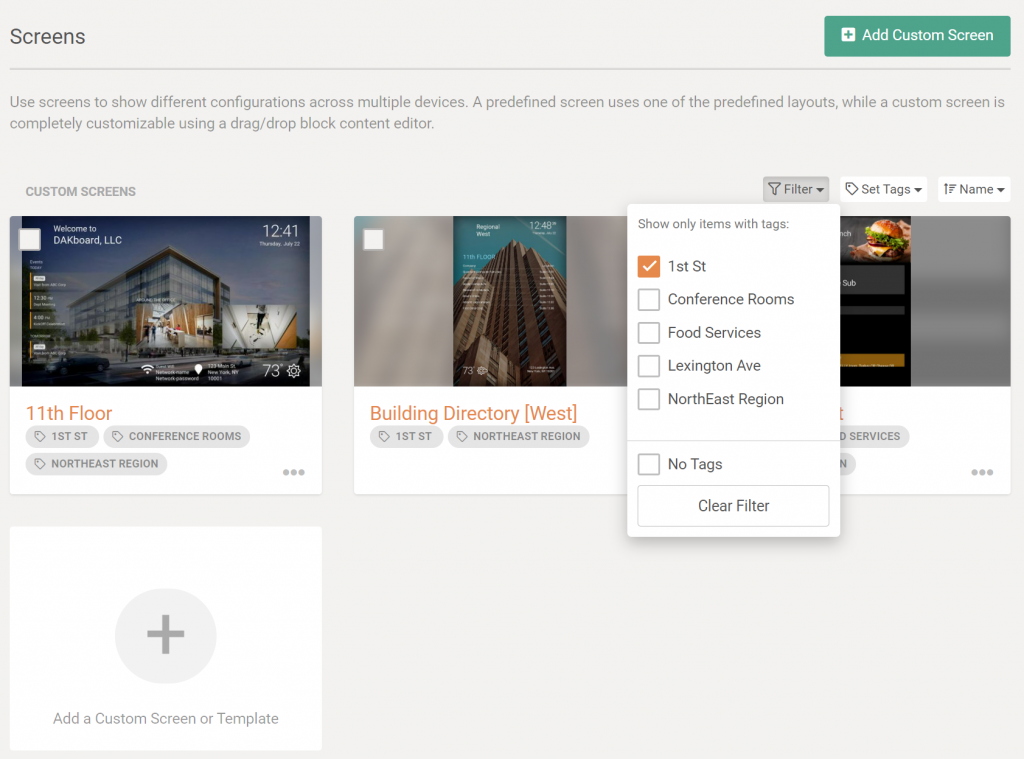
Once tags are applied to screens, large lists can be easily filtered to manageable sizes by using the “Filter” button near the top of the list.
Thanks!
We hope you’ll enjoy these latest features. If you have any questions or feedback, we’d love to hear from you. Feel free to post a comment below or check out our support page for more information.