 by
by Creating a custom DAKboard device just got a whole lot easier. We are excited to announce that you are able to use your own device and link it your DAKboard account! This can come in handy when creating DIY DAKboard device or using a mobile device on the go. Read on for more details!
User Devices
Being able to have custom devices that display relevant information in a convenient location is the pinnacle of a DIY DAKboard device, and the option to do so has gotten even better. User Devices is a feature that allows you to add your own devices to the DAKboard device’s screen, and no longer need to copy the DAKboard private URL manually to the device. This feature is available for DAKboard Essentials and higher subscriptions.
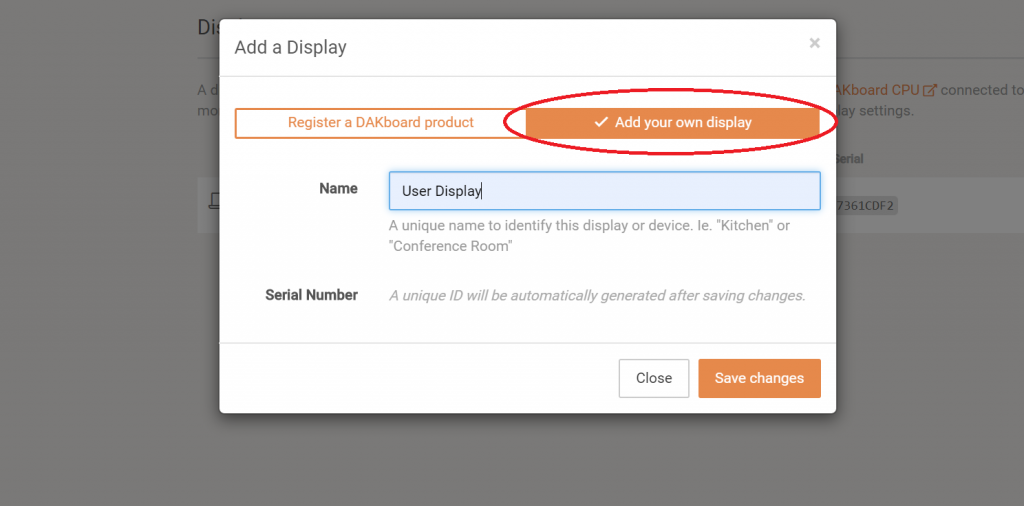
In your DAKboard account, go to “Displays & Devices”, click the “Add” button and select “Add your own display”:
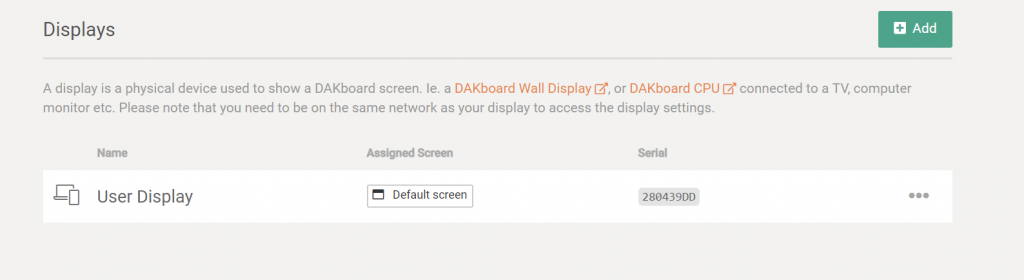
User devices allow you to name and generate unique serial numbers for your device so you are able to manage them. What does this management exactly lead to? Instead of having to constantly update your web browser by refreshing or changing the URL you are able to push updates directly from your DAKboard account to your user device. This will make easier for those who use DIY DAkboard devices, Apple Devices, Smart TV’s and much more! This feature is not only supported with DAKboard screens, but you can also assign loops to your device as well. This feature is offered with our new Pro and Plus plan as listed.
Device Linking
Once a user display is named and the serial number is generated, link the device so you are able to assign screens and loops to it.
To do this, first click on the three dots on the right of your user display:

After, click on “Link with Device or TV.” Follow the instructions displayed on the screen:
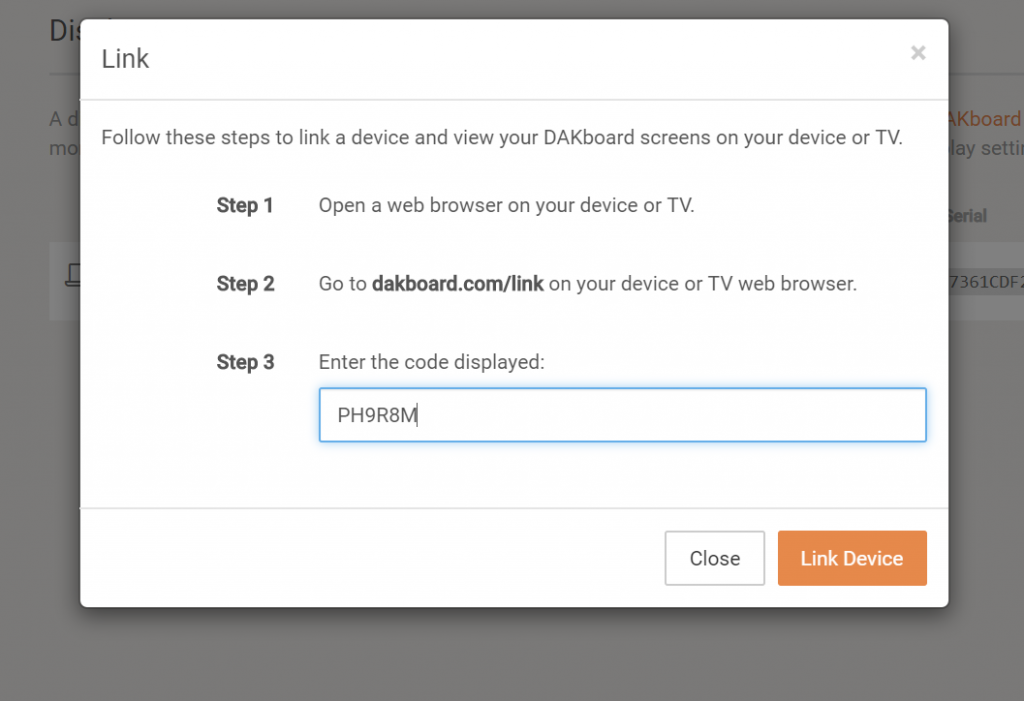
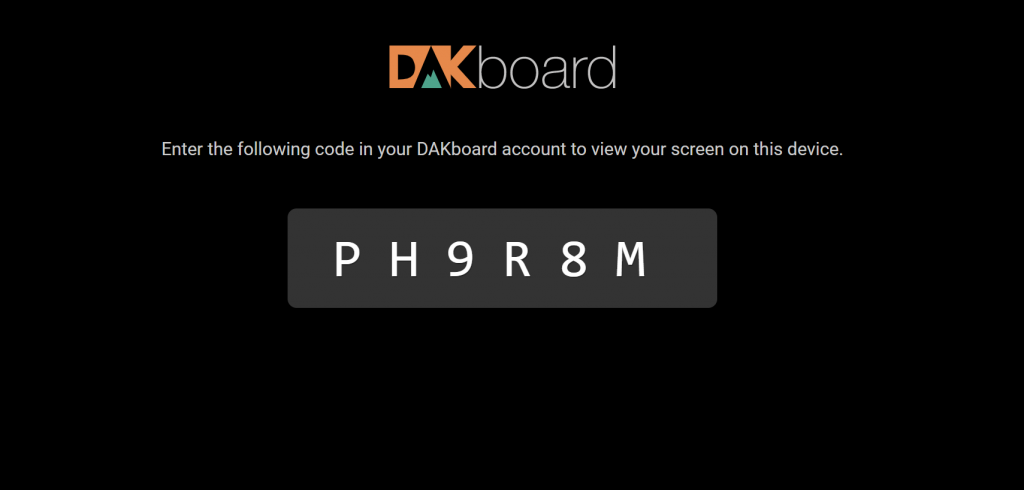
Next, click “Link Device” from within your DAKboard account, and your device should appear like a typical DAKboard display. After that, you are able to customize your screen and add loops to it.
We are excited to see what devices you’ll use with this new feature!
Free Plan
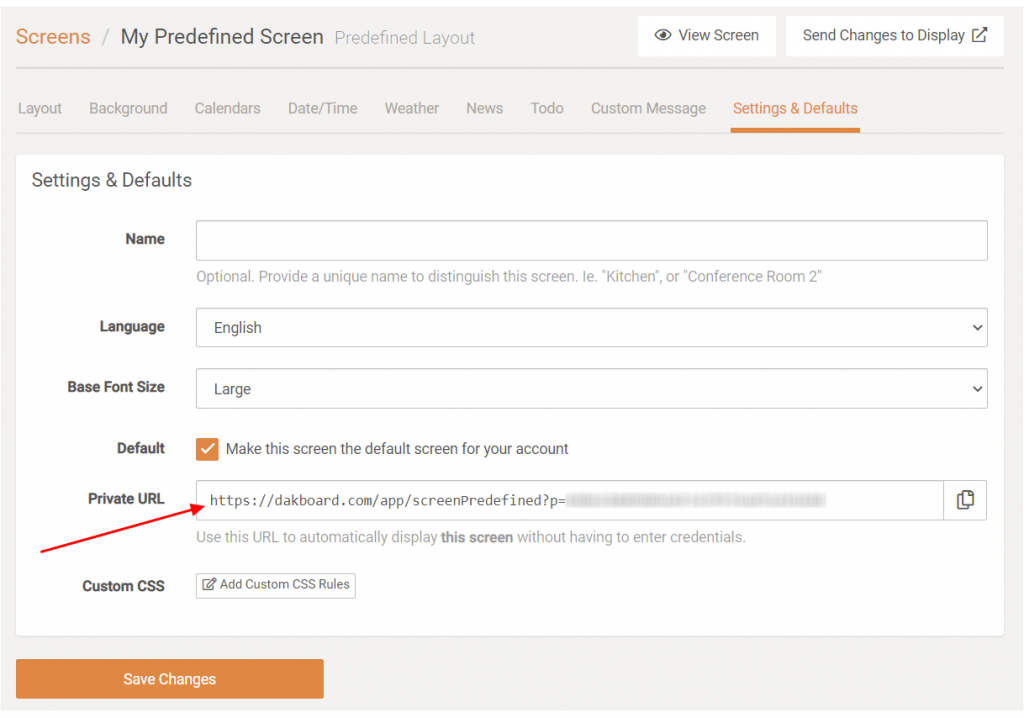
DAKboard customers using the Free plan may still display screens on their own devices, too! To do this, go to “Screens”, select “Predefined Screen”, and then switch to the “Settings & Defaults” tab.
On this tab, find the “Private URL” field. Place this value into a browser on your own device/display and it will now show your screen.
Thanks!
The entire DAKboard team thanks you for using and supporting DAKboard. We’re committed to building the best product possible and we’re excited to share that with you.
If you have any questions or feedback, feel free to contact us!
No where in this article does it say you must have PLUS to do link a DIY device. Also the PREMIUM grandfathered users do not have the ability to do this either.
It is actually a shame that it requires PLUS to link your screen since there is already a screen limit in the type of account you have. I would respectfully ask you all to make this available to all accounts as I see no reason it should just be for PLUS users.
Hi Scott, thanks for the feedback. We will consider this for a future release.
I second that, especially given the screen limit. I would pay $4 a month for the simplicity of device linking, at $8 I just can’t justify it.
Please make it clearer that you need to upgrade your account to do this – as a newbie trying Dakboard out your documentation is really confusing because some things are only available for non-free account levels and it isn’t immediately obvious if your documentation is out of date or I need to pay.
Hi Peter, thanks for the feedback. We’ll see what we can do to make that more clear.
Thanks Scott,
nearly 2 years on and DAKBOARD still havent taken your suggestion on!
Very disappointed. This feels like a “bait and switch”. The ‘free’ account states you can connect one device. After creating an account, and setting up my board, the only display available for the free account is a Dakboard device – which is an additional purchase. To use your own device (TV, monitor) you must upgrade the service.
Hi Robert, my apologies for the confusion, you’re definitely welcome to use your own device on the Free plan. Just find the Private URL in your screen settings, then load that URL on your device and you’re good to go!